| Entrance | Mainstreet | Wiki | Register |
|
# of watchers: 7
|
Fans: 0
| D20: 10 |
| Wiki-page rating |  Stumble! Stumble! |
| Informative: | 0 |
| Artistic: | 0 |
| Funny-rating: | 0 |
| Friendly: | 0 |

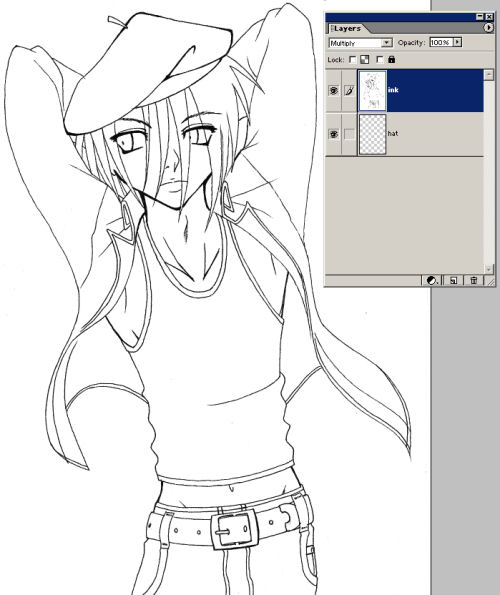 Isn't he adorable? ^^
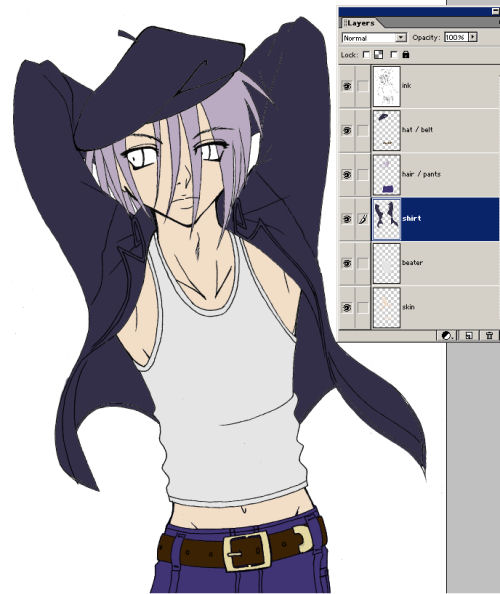
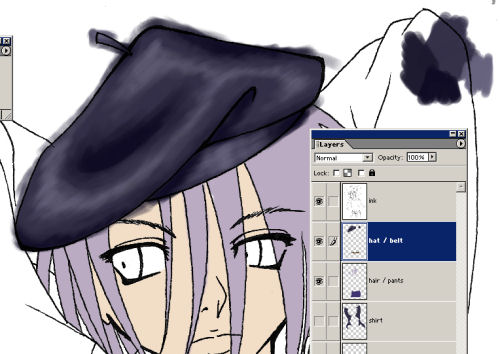 And just keep on with all your layers.
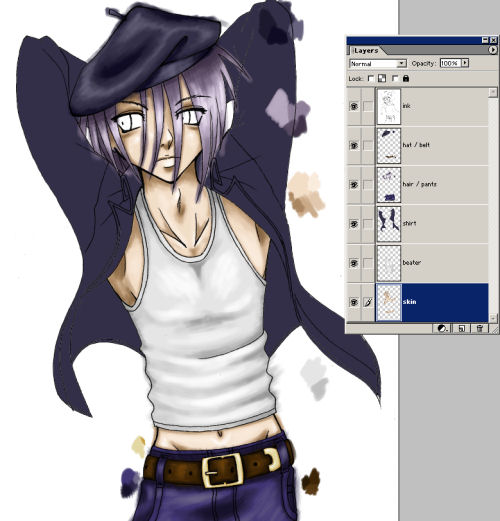
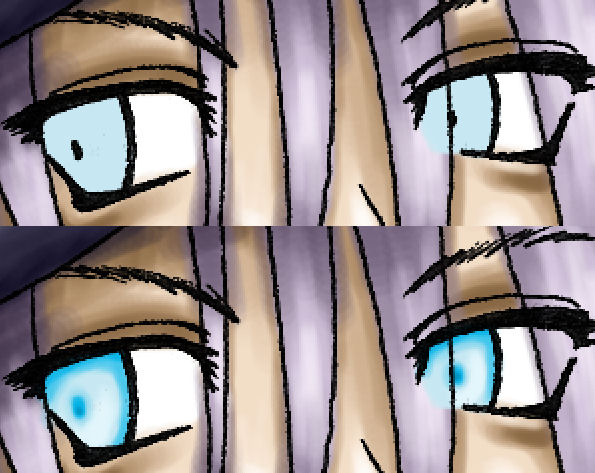



 Using soft-edge brushes and a low opacity will allow for a lot of blending.
 Painting is good. Try to use color, not just dodge and burn.
 Paint big, if your computer can handle it. Things will smooth out with the resize, and you don't have to go in with such tiny brushes.
 300 dpi is good.
 Save often. It hurts when you loose hours worth of coloring.
 Going to test something? Make a back-up layer first, especially if you won't be able to undo all the changes.
 Make sure your lines are closed, and convert them to pixels using threshold. Flatting becomes a breeze.
 Whenever you find yourself in front of a mirror, study the way light and shadow wrap around things.
 Experiment. Happy accidents happen. But save often.
 Don't expect people to tell you exactly how to paint your image. Use your imagination.
 Warm light, cool shadow. Cool light, warm shadow.
 Backlighting + secondary light sources. Try it.
 Warm up a bit, and relax. Take a break every now and then. Keep your wrists loose.
 Save. Like every 7 minutes.
 Avoid pure white and black. Everything has some color to it.
 Start with the background, if applicable.
 Practice, practice, practice. Mad skillz don't show up overnight.
 Learn from your mistakes.
 And remember to save.
 August 2006
  December 2006
 Elftown Tutorials. Good stuff.
2006-08-11 [Zab]: Neat! :P But I have a question.. why don't you use ''lock transparency'' when you shade? Wouldn't that help so you don't have to clean all your 'mess' up afterwards, or is there a special reason for it? :P
2006-08-11 [stuffAEAmade]: With my flats, I usually end up with little transparent blips that I still need to cover up. But that does sound like an easier way of doing it. I'll try that with my next CG. :)
2006-08-11 [Zab]: Ah, okay:P Because it looked neatly colored from the start..x) I just find it easier to color the white/transpar
2006-08-11 [stuffAEAmade]: I use the magic wand selector tool, and sometimes it doesn't go right up to the edge of a line. However, clean-up's not that hard, I just use it to select the outside of the lines and delete all the messy strokes. Until I run into gaps in my lineart anyway. xP
2006-08-11 [Zab]: Oooh..clever..
2006-08-11 [stuffAEAmade]: There, now we have each learned something new. Mission accomplished! xPP
2006-08-11 [Zab]: Yay! *toodles off happily*
2006-08-14 [stuffAEAmade]: I have to teach myself how to CG a decent background before I can write a tutorial about it! :P
2006-08-20 [eyes of frost]: Well the one up there looks pretty damn good to me. *Still tapping foot*
2006-08-21 [stuffAEAmade]: It's just a toner pattern tinted blue and set to multiply with a gradient on top... or was the gradient set to multiply... Hmmm. =/
But, that's all it is. :)
Number of comments: 31 | Show these comments on your site |
|
Elftown - Wiki, forums, community and friendship.
|